In September 2017 I purchased a 1924 Cape Cod styled home from the Community Board of Camp Washington. I searched almost a year with my agent Steve Petersen before this opportunity presented itself. I toured the house with Joe Gorman, former Camp Washington Board Executive Director, when another couple was going to purchase it. The vision for its restoration came to me during that tour. Almost everything I envisioned that day has materialized. It took three years, but my restoration journey is 100% complete.
I watch a TON of HGTV and DIY shows and I fancy myself an “advanced DIYer”. I knew I wanted my first house to be a fixer upper, so that I could put my mark on it. I was empowered and emboldened by their shows to think I could handle a renovation project. Yes, this house was a bit more of a project than I set out to find. Interior design I did not consider one of my strengths. I spent the first 53 years of my life living in what my parents created. I didn’t know my decor style, so their network shows helped me find it. I enter their home giveaways all the time, but it was the 2017 Urban Oasis Giveaway that I fell in love with and it inspired almost all of my exterior and 1st floor interior color schemes. The pink door was my fastest departure, couldn’t do it. These are pictures of the areas I copied most:
I’ve already been asked if there is anything I’d do differently. I was able to quickly respond with one item, but there are three. I would have added a small can light above my stain glass window, similar to the one I put over the kitchen sink, so that window could stay illuminated at night. It’s one of my favorite original features of the house saved thanks to Architectural Art Glass Studio. I would have returned lights to the 1st floor bedroom closets. All three of the closets were reduced in size for duct work or a pocket door addition, so I didn’t think a light would be needed. I was wrong. The final item is I would have found the money and allowed Tiburon Energy to do foam insulation. I believe my master bedroom would have much better temperature regulation and I’d have less air seepage around my outlets if I had gone that route. It would have been an $8,000 investment that would have paid off long-term with energy savings.
Any regrets, many, but would I do it again? ABSOLUTELY! I shed a lot of tears and weight; not everything went according to plan, but it was a miraculous journey that I’m so grateful I had the opportunity to take. My life had purpose for the last three years. I learned and grew in so many areas. I’ve written this before, but what I’ve discovered is that at age 53 I truly enjoy working with my hands. I have a connection with the craftmanship that goes into old homes. I want to honor it and enjoy bringing it back to life. Call me weird, but my house spoke to me throughout this journey; she (her name is Janet, after my beloved mother) gave me a supreme sense of appreciation for saving her. I’ve gotten nothing but positive feedback from my neighbors, which is also humbling and appreciated. This house was an eyesore on the street for a very long time. I learned that the last owner actually used the backyard as a junk yard, which now explains why I dig up so many random car parts whenever I do yard work.
 On October 24 I hosted another open house to show off the finished project. Once again I forgot to take pictures, but about 30 people came through and each got a souvenir bottle of hand sanitizer (making personalized hand sanitizers may become my new side hustle). With the news coverage of Covid-19 cases escalating the week leading into it I’m shocked anyone came. Of those that did about 40% were first timers. A business client and her husband gave up OSU football to see her a second time. They’ve been steady followers of the blog. I loved having her filled with people and great conversation. She deserves more of that. I’ve restored a beautiful house. The hard part will be making it feel like a home, which is a struggle given one vision I had for my life in this house will never come to be. The day ended with some close friends joining me for dinner and a toast of the completion. Hopefully the global leaders will quickly eradicate this pandemic, so that I can host more gatherings like that.
No final post on a restoration is complete without before, during, and after pictures:
Exterior: The thing I’m most proud of outdoors is the front yard. Believe it or not the very first project I did at the house was using my drop spreader to treat for weeds, which outnumbered the grass. I’ve been regularly treating the yard ever since, either myself or with a service. I put down tall fescue grass seed the first two springs, wrong time of year as summer heat got me before it really established. Finally this fall I rented a dethatcher to pull out the matted dead grass and weeds and then an overseeder and put down approximately 25 pounds of seed. With the paint job, pergola, and landscape the house is stunning, but it will only look better next spring when the grass is really full and luscious.
Original Light Fixtures: The house had been striped of all copper and metal. The  looters took what they thought would make money at the scrape yard, but they left things of real value. All of the original moulding, unpainted, was still in the house and most of it was in really great shape, just dirty. That is why I personally removed, labeled, and bound together rooms before my demo crew started. All of the doors, even the ones too damaged to use, still had their glass doorknobs These sell for $20 and up on Ebay. Many rooms still had original light fixtures, albeit covered in paint or nicotine. I was not expecting the brass when I boiled some in hot water to remove the paint. Every original light that was left I was able to salvage, clean, rewire, and reuse.
Entry Foyer: The doors, entry and closet, were the greatest transformation. I lived with that front door through one of the coldest winters in Cincinnati’s history. The idea to put wallpaper in the hall closet was one of my favorite suggestions from a friend. Hopefully guest will be inspired by the message. I found it on a site Murals Your Way. This will be my signature mark if I ever get to restore another house.
Living Room: This room is a blend of my new found style and my mother’s. The rug, sofa, and oversized chair I selected from Haverty’s, but the rest of the decor, was my mom’s. I told my salesperson that the lamp and table must stay. I discovered my mother and Elvis (yes Elvis Presley) shared the same taste as a similar white lamp is part of the tour of Graceland. The only thing this space needs is the gas log set for the fire place. Clearly large screen televisions were not on the minds of the original builders as the height of the fireplace forces the elevation of the TV to be too high. The work my father and I did to allow for the running of electric and cabling makes it look like it was always meant to be.
Dining Room: I love the placement of the original wall sconces in this room. They were originally located in the living room, but clearly three of them were missing based on the holes in the wall. Of course the biggest transformation of this room was the removal of the wall that separated the dining room from kitchen and hall. You may ask why I have pictures of the yard with the dining room? Well the walnut trees you see are what created my gorgeous dining room table. The legs I had a full year before I bought the house. I just thought they’d make a great table I’d like to make one day, little did I know. It truly turned out amazing and having the chairs match the legs the way they do……..my mind’s eye hit the bullseye with that project.
Kitchen: Even before I saw the HGTV house I wanted blue cabinets, my favorite color. That house just confirmed I was making a great decision. Without question saving the original built-in was the greatest accomplishment of this space. The profile of the doors from an almost 100 year old cabinet I was able to select for my brand new cabinets. I impressed myself with noticing and making that detail happen. I’m so grateful Sosa Flooring (Sergio and Martin) were able to restore the floors properly. Until I made that correction the kitchen was not enjoyable to use and it loomed as my worst contractor decision of entire project that I had trouble forgiving myself for making.
1st Floor Hall and Bedrooms: When I saw the hint of brick from the fireplace I knew something special was being revealed. My cousin and his friends used a hammer and hand chisel to uncover the entire brick wall. A coating of LastiSeal stopped the crumbling and flaking to leave me with a gorgeous statement wall. Nothing super remarkable about either rooms. The first acts as my office. I still can’t believe it took me two years of searching salvage stores in the region before I found a door at Columbus Architectural Salvage. It turned out to be the exact size and swing for my opening. I just had to strip the paint and stain it to match the others. The hall and guestroom are decorated in tribute to my mom, so they stand out as my favorite areas of the house.
1st Floor Bathroom: The demoing of this bathroom was the toughest part of entire house. The original tile was set in concrete and wire mesh. My cousin and his friends were put to the test moving the original cast iron tub. I had done tile work on a much smaller scale, so what I pulled off in that space still amazes me. I know a professional would have easily charged me $5,000 or more. My goal was to restore the original look as much as possible. I used 4″x4″ tile on the floor, repeated the chair moulding, used 1″ hex on the floor. The “rug effect” was a twist and challenge for a advanced DIYer. In retrospect I should have just gone with a gray grout throughout. Putting white on white and black on black was a nightmare to do. It turned out OK, but it was also the reason I moved into the house without a functioning bathroom for the first two weeks. Converting a $15 salvage cabinet door to a mirror and putting it on a barndoor rail for the medicine cabinet was one of my most creative moments in the whole restoration.
My master suite is oh so SWEEEEET! I purchased a two bedroom, one bathroom house. More than enough for my single lifestyle. However the first time I walked up the stairs to the attic space and I saw the full height ceilings I said “this would make a killer master suite” and that is exactly what I created.
Master Bedroom: The Pinterest project to recess a $50 dresser in the wall to save space (like I needed to) turned out great. I was shocked I actually had enough clothes and shoes to fill my master walk-in closet, but I did. Of course my favorite project of the room is the bedroom furniture set (headboard and nightstands) I made from bead board reclaimed from the basement. If it were in my control I’d make sure that set never leaves the space; as long as its functioning it should stay in the house.
Master Bathroom: The bathroom is the size of my former bedroom. The original bathroom for that floor was confined to a dormer that held a 4′ tub, toilet, and sink. That same space is now just my water closet. Having the laundry room upstairs is so convenient. Converting dead space into my linen closet repurposing the small closet door I removed for the dresser insert was another sign of my growth as a designer. I had never laid flooring, let alone use reclaimed flooring I had removed to lace in with the existing floor. It was another proud moment. Sketching out and having built by the Amish my vanity cabinet was pretty cool too. Amazingly the tile work in this room, even with the angles was easier than the 1st floor. Mitch Altman, owner of Thermasol, a steam shower company, helped me turn the lemons from my poor performing shower system to lemonade by making his steam unit affordable to me. The entire space, with its massive steam shower and deep soaking tub, is a true home spa oasis that I’m not quite sure I deserve, but glad I have.
I want to thank my friends and family that supported this journey financially, physically, and emotionally. I must give a special shout out to my father who left his home in Florida to spend multiple weeks each visit with me in the first and hardest year of the restoration to help me accomplish what you’ve seen in these pictures. He has said to me many times I waited until he was old (he was 77 when I started and will be 80 in January) to finally show interest in something that has always interested him. We fought and argued throughout, but I learned a lot and the job got done. I did not have the funds to pay a contractor for what we accomplished. Our sweat equity is in the multiple of thousands in dollars saved and quality was never sacrificed. I also want to thank everyone that followed my blog during this journey. Prior to this post I had written 212 others, which have received 67,000+ views from 7,557+ visitors that have come from 68 different countries from around the world. I’m humbled and honored by that level of attention and hope that I inspired anyone hesitant to take a similar journey or helped anyone already taking one.
This is the final post of My First House – It Is Well With My Soul. I’ll be changing the name of my blog to Sista Girl With Skills, but will continue to write about my DIY projects. Phase II is the new construction detached garage. Covid-19 has had a devastating impact on the hospitality industry where I’ve spent the last 20 years of my career. They say you can’t teach an old dog new tricks. I hope that’s not the case as my soul is yearning for another old house to renovate. I’ve found something I can be passionate about. They say a job is only work when you don’t enjoy what you’re doing. That has definitely been the case for much of my career. HGTV has Flip or Flops in several cities throughout the USA. How about Rehab Addict Cincinnati starring…………Venus, Sista Girl With Skill!.


 planned to buy a greenhouse, but I pointed out that she could build one cheaper. My 4×8 Lean-to shed only cost approximately $500 in materials, a fourth of what she had planned to pay. She asked if I would help her and I said yes. Since I had successfully built my shed, by myself, I told her to check out the greenhouse plans at


 I met Cassandra in 2019 at a client’s conference. She is a Black Studies professor at UC and as it turns out lives near me. She is also the owner of
  I told her I couldn’t get to it until I finished my house and a couple of build projects I was working on (i.e. my


 After applying the Valspar to the first side of the box panels I noticed that it really absorbed into the plywood, which was a mix of Birch I bought for my project and Pine left over from


 During the Jim Crow era, trains were segregated and Black people were not allowed to visit the dining cars. Many passengers would pack a meal in shoe boxes when traveling to southern cities. Road trips by automobile also present challenges for blacks looking for places to eat along the way. Planning a head with boxed lunches became a tradition. My friend Carolyn Wallace, owner of Perfect Brew Catering, resurrected this tradition as part of her business offerings. She krafted her own moveable feast box, adorned with artwork by Artistry T. Design, for her clients looking for boxed meals vs. a traditional catering setup. A friend of hers, Kashara, wanted to immortalize Carolyn’s paper box in wood and asked, given my newfound skill set, if I could make one. I took the challenge.


 be fixed is complete sanding. I opted to not do that because there were several raised areas in the veneer, most likely due to water damage, and I did not know what sanding would do to those areas.


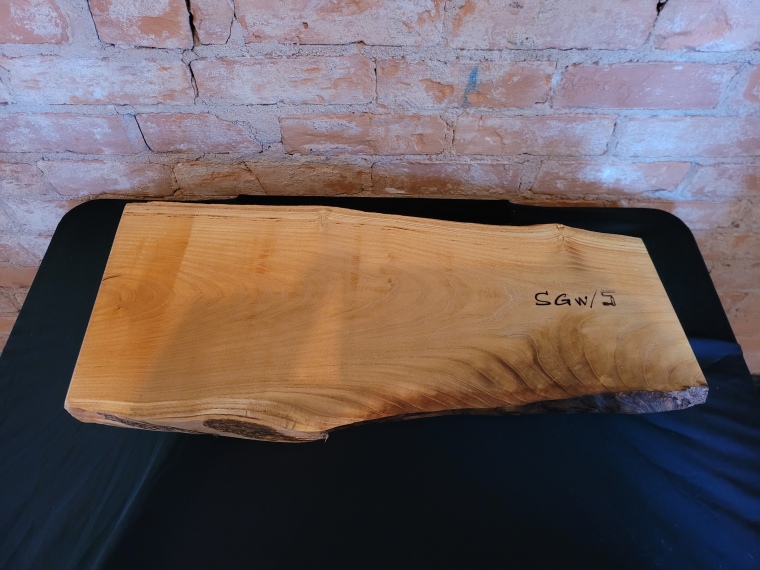
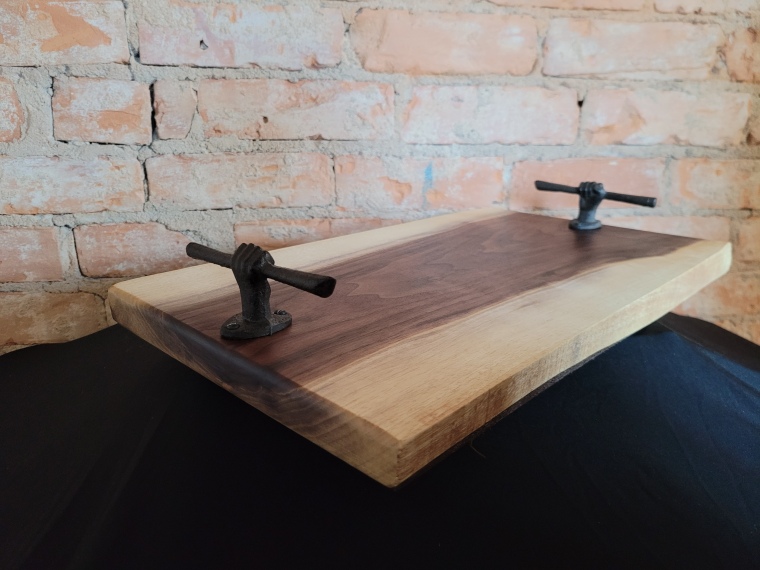
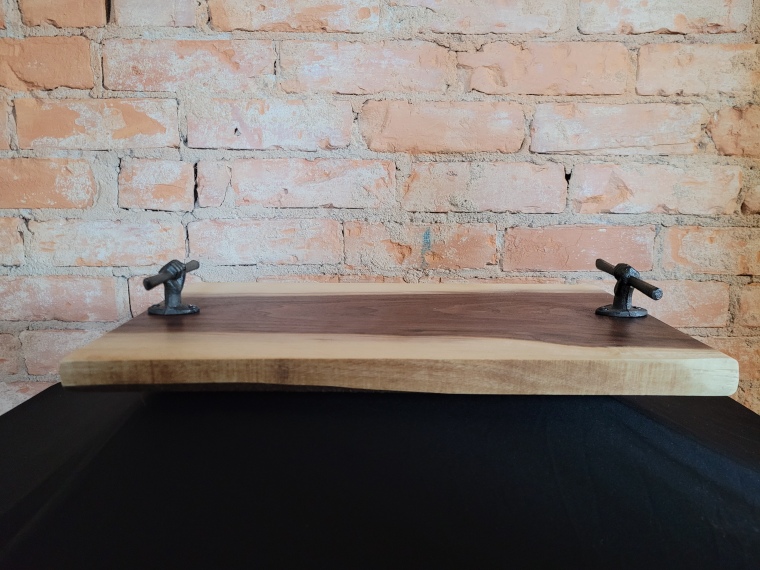
 course of three weeks. You spend more time waiting for stuff to set or dry. I think Sista Girl with Skills furniture line has been born. I have two more slabs of mulberry left, plus the crouch that didn’t break. I’ll be partnering with Anna Petersen,
 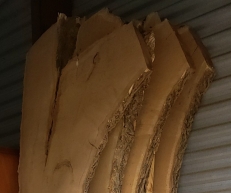 From the crouch of the mulberry slabs left from my